I am Lovin'TheGoodOleDays!


Welcome to my blog. I'm glad you're here. You'll find information about my shop; favorite recipes; features of other crafters and artisans; tidbits of beach living; and the ups and downs of life.

Yes, there were some things about the past that were definitely great, but everyone's list is slightly different. This blog is my contribution to the things that make life great, and not so great. Like all things, this blog will grow and change as I do. Come grow with me.

Thursday, March 19, 2015

Promoted Pins How To; Step By Step in Pictures


So, somehow the powers that be in the Pinterest world decided that I am worthy of running promoted ads, as there was an invitation waiting for me when I logged on today. Well, I figured I would have a go at it and add a few items. The first one took a while, as I had to make sure I was doing it right. Then I got to thinking; since this is such a new feature, maybe it would make a good blog post topic. I can't be the only one who likes a good how to, right?

The first thing you'll do if you have a red "promote" button next to your name is click that or accept the offer to promote if that shows up on your page. You can also click on your name, then the settings gadget, then scroll down to "promoted listings."

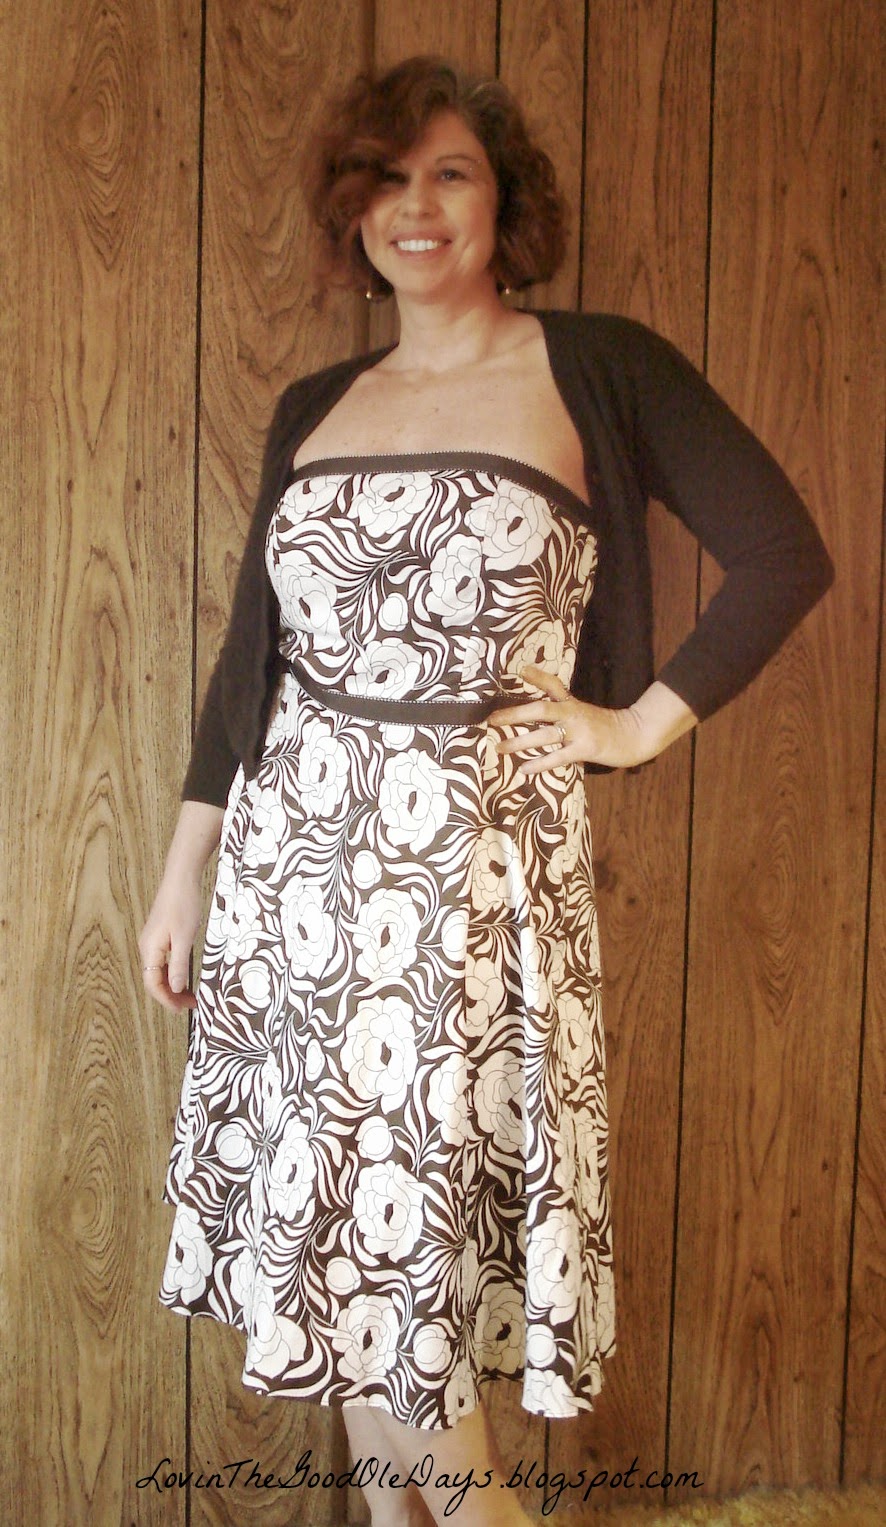
Now chose a pin to promote. My first campaign was for a sweater dress. This time I chose one of my tank tops.


Once you have chosen which pin to promote you will need to enter in your search terms. I typed in "womens fashion" and this is what showed up. Click on any relevant terms that you want to include. I wanted to add others, so I just entered different words in the search bar until I found enough terms.


 I know I said they recommend 20, but since this is pretty much an experimental run, I thought this was enough. I also didn't see how to separate terms with a comma, as they showed up in the right-hand column when I clicked on them.

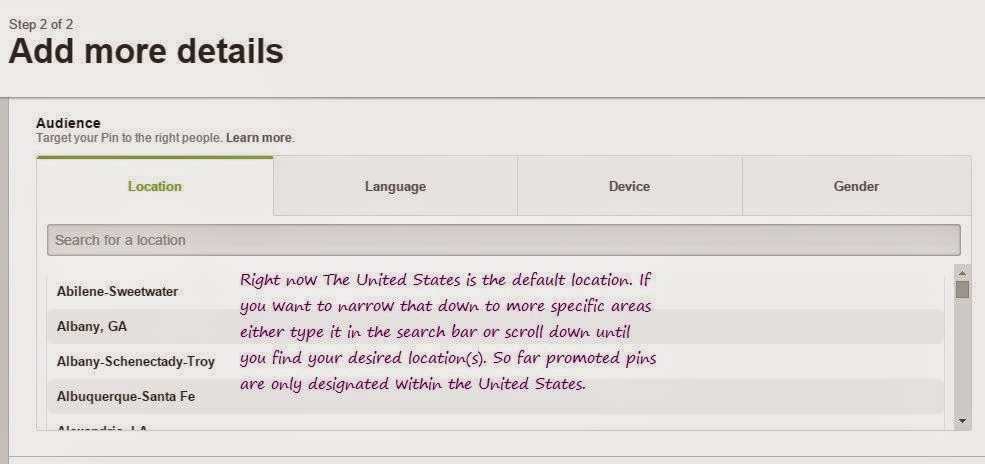
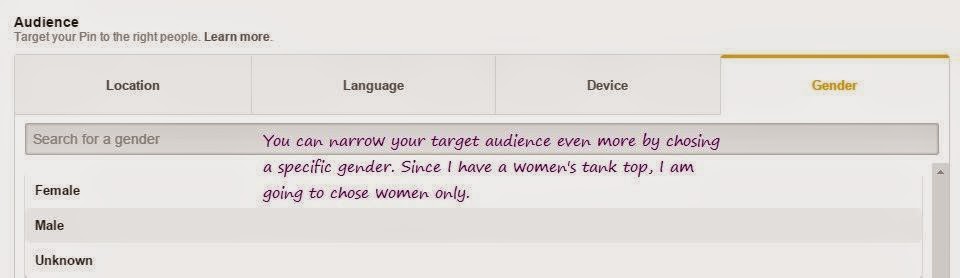
This next step is where you will narrow down your target even more by choosing your demographics.


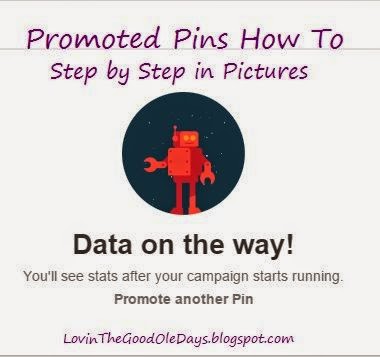
Now you will decide on the details of your ad campaign. You will need to decide just how much you want to spend per click, you will double-check that the link is correct, give your campaign a name, set the length of time you want your campaign to run, and set your daily budget. When you're all set hit "Promote This Pin."


Next up, you will enter in your credit card information. Right now PayPal is not an option, but maybe they'll change that in the future.

All along the way you will see "Learn More" next to the step to be completed. It will take you to The Pinterest Help Center page, Create and edit Promoted Pins. Scroll down "Learn How To" and you can click on the topic for more help.

I'll let you know how my campaigns went. If you already have tried this feature I'd love to hear what you think of it.

Monday, March 16, 2015

Thrift Store Bandit

I've learned one very important lesson in marriage...when your husband asks you if you want to go thrift store shopping you say yes! (Of course, that's not the only thing I learned, but it's always a fun time...well, for me it is.)

This Saturday my husband and I went to no less than 5 different thrift stores and it was awesome. I made out like a bandit, just ask my husband. He was on the hunt for a power tool, but I was on the lookout to expand my sweater collection, find sheets for my craft fair both, and maybe even find something for myself.

Stop #1. The ACTS. What can I say? I rarely leave here empty-handed. In my opinion this is the best local thrift store in the area. As you can see, folks like up waiting to get in. I, myself have stood in that very line many times. You just never know what goodies are waiting, and sometimes you need to be quick or they're gone just like that!

A typical day before the doors open at the ACTS. Photo courtesy of The Coastal Point

So, my haul from the ACTS? Four sheets and 5 sweaters! I'm collecting the sheets to make a table cover and side walls and the sweaters get upcycled into new sweater creations.


4 wool sweaters, 1 silk sweater, 4 flat sheets


Next up, The Frankford Presbyterian Church's thrift shop. My prize?

Two beautifully detailed tablecloths (I'm thinking sundresses or skirts)

New, crushed velvet burnout Liz Claiborne blouse
in my favorite color, still with tags attached 
After a quick stop at a local gun shop for some browsing and a mini lesson in gun parts we headed up the street to Peddler's Alley; a combination of antiques, crafts, and thrifty treasures. Still no power tools, but I scored big time, again! How often do you find an Ann Taylor sundress for $15, still with the tags?

New Ann Taylor sundress with a
previous thrift store cashmere cardigan treasure 
 Not done yet. You never know what fun stuff you'll find at the Goodwill. Little Man scored this time with a new-to-him WII Star Wars game. Then on to yet another one...Wohoo! Let's go.

There's a great thrift shop in Millsboro. We found a few books on personal finance and survival skills(?!). Oh, and this Kathy Ireland sweater, also new, with tags.

The faux fur collar is detachable. Nice, plus it's purple!

Last stop, a row of antique shops on Route 113 near Dagsboro. I love looking through these shops. Big ole chairs, vintage advertising, ornate tables and dressers. I was lucky. I had been on the hunt for shutters for my craft booth and we were in luck. Plus, I found a perfect little magazine rack for our growing magazine collection. I still can't believe we fit all this stuff in the car.

These are going to be my clothing rack for
 my craft fairs. Scored some poles from
 the ACTS a while back and they match perfectly.

$6 for them, priceless for me.


So, my husband never did find that elusive power tool, but he's a little closer to being prepared for the zombie apocalypse and he did find a screwdriver and some jeans. But, I had a fantastic day.

Are you a thrift store enthusiast? Have you written a blog post about some of your fabulous finds? Share them in the comments below.


Friday, March 13, 2015

I Made My Own Social Media Icons


This year one of my goals was to come up with a color scheme and use it pretty much everywhere.  After discovering the design seeds website I found exactly what I had been searching for. It's a lot like love at first sight. I just knew this was perfect for me. Aren't these great colors?

fallen hues from design seeds

As you can tell I have changed the look of my blog using these colors and I'm really please with it, so far. I'm still working on tweaking it to really make it all mine.

My latest venture took place last week when I decided it was time to tackle the hodgepodge collection of "follow me" icons. I know they are a necessity for anyone who is looking to build a social media following, but I wanted them to match my color scheme and take up less space in my sidebar. I've seen enough blogs to know it can be done; I just had to figure out how.

I watched several YouTube videos and started working on my buttons. This was my original plan. I had my matching background and all the icons. Since my sidebar is set at 310 pixels wide I made the "Follow Me" banner 10 pixels narrower. I used PicMonkey to create my icon graphic.


I used the rounded square geometric shapes, 55 pixels, evenly spaced, for the buttons. Then I did an overlay for each icon. For bloglovin, Etsy, facebook, google+, and twitter I just found a font that matched the originals. For instagram, networked blogs (which I later removed) and pinterest I found images online. I was quite pleased, but I couldn't figure out how to add this lovely image, with clickability, onto my sidebar.

Yup, once again I had jumped in too soon. It wasn't until I watched How to Install Social Media Icons on Blogger Sidebar - The EASY way! by Emily M I knew what I had to do. The video explained every step clearly enough for non-techies to understand.

The key is to NOT have a background (facepalm). So I went back to pickmonkey and cut out all the little icons and the follow me banner and came back to my blog. 

Here's the nitty gritty of how to set this up once you have your icons. (You can also find a plethora of downloadable icons to use if you don't want to make your own.)
  • Create a new post, titled "Important Do Not Publish or Delete."
  • Add your first icon image.
  • Click on the image to add a link. You will need to do this twice ( I don't know why, but you do.) 
  • Enter the website info.
  • Repeat until you have all your icons added and linked to a site.
  • In "HTML" mode copy the whole code.
  • Go to "layout" and click on "Add A Gadget," then click on "HTML/Javascript"
  • Paste the code you just copied into the content box. Leave the title blank.
  • Place it in your sidebar.
I had to tweak mine just a bit by adding a space between the images and I originally did not have the "Follow Me" banner, but then I added it before the first icon image. (I also had to resize it because it was just a touch too wide.) Remember, every time you make changes to the code you will need to copy and past the new code into the content box for it to be recognized.

And here's the finished, and clickable, social media icons now...


So, I had to forgo the background, and it pretty much took a whole day, but I didn't have to pay anyone and I like how it turned out. The hint of color on the edges of the buttons reminds me of tea-stained tags. Neat.